Swapping out car stereo systems doesn’t have to be a chore. Save a few bucks by doing it yourself. CableTiesPlus is going to show you the simplest process, requiring a little grit and some handy tools.
What follows is a basic guide. Keep in mind cars and systems can vary. Before you attempt to replace a car stereo, read instructions that come with the new system and review any materials for the old one. If you have none, get it online or from the manufacturer.
- Disable the vehicle to avoid sparking or short-circuiting the electrical system. Set the parking brake and turn off the ignition. Disconnect the battery’s negative cable. The negative component is usually black or has a visible minus sign. Use the appropriate wrench to loosen and disconnect.
- Unscrew the stereo system’s trim. These are delicate instruments. You don’t want to pry the trim out and unintentionally damage it. Make sure you get all the screws. Use a flashlight, even in broad daylight, to find them. There might be drawers or knobs to remove first.
- Prepare the stereo system for removal. Some are held in place by screws or nuts. Others may need a removal key, such as an L-tool or horseshoe shaped tool.
- Pull out the stereo. You may need pliers — needled nosed, preferably. If everything’s good, it will slide out easily. Otherwise, may sure you haven’t left anything in place, such as a screw.
- Before doing anything else, review all components, such as wiring and connectors. Take pictures for reference.
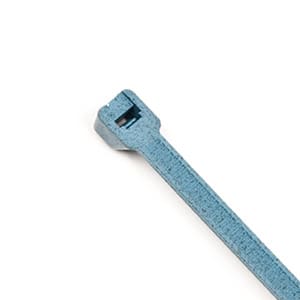
- Remember, systems vary. Connections may be as simple as they get, but they may also be complicated. On average, there will be an antenna wire, and wiring or harness connections. Use cable ties to distinguish wiring, neatly grouping them and making them easier to work with.
- Disconnect everything. Compare the backs of both old and new stereos. If you’ve done your homework, they will already be compatible, but a visual always helps. Always be ready to refer to the appropriate manuals and pictures.
- Check all wires! If you see any unsafe conditions, such as stripping or breaks, take a little heat shrink tubing and secure them. Match up connections, which should be color-coded and review each wire on the new system. Solder or crimp connections and, for easy identification, use cable ties to carefully bundle wires, especially if the system doesn’t use harness connections.
- The new system may come with its own mounting kit that needs to be assembled. Do so by following the instructions that came with it.
- You should be able to install the new stereo by essentially reversing the process used to remove the old one. Make sure you carefully ground the system, as this is critical to optimal performance. Always refer to manuals and the pictures you took for clarification, especially if you’re even the least bit unsure of what to do next.
With the battery reconnected, now comes the exciting part – test your new car stereo, making sure everything is working to your satisfaction. Now sit back and marvel at your handiness, as well as your fantastic sounding new stereo system!


